First-Time Photographer? This Is For You
By Warren Glam – Content Writer
With the passing of every hour, countless ancient sequences play out in East Africa’s wilderness. Newborn calves take their first steps on shaky legs. Vast herds follow life-giving rains across the savanna. Salivating hyenas inch towards feeding lions, fearful of attack, but hungry for the mauled carcass in the pride’s maws. This is what you photograph on safari.
Better still, some tradecraft can help you capture these scenes well. Eugene van der Merwe, Head of Photography at Orms Cape Town School of Photography, has aided us in creating this list of tips, for doing just that. Don’t let the camera-lingo scare you off, this guide will help make it all that much easier when heading off to purchase the essentials.
Gear List
Regarding the essentials, you’d want either a mirrorless or DSLR camera and kit lens, which typically has an 18 to 55mm or 18 to 105mm lens. That said, you’d benefit more from a longer lens as you ordinarily can’t get too close to subjects on safari.

For a camera with an APS-C-size sensor (cropped frame), you’d be looking at a 55 to 200mm or a 70 to 300mm lens. An 80 to 400mm, 100 to 400mm or a 150 to 500mm lens would be slightly pricier options, though you’d get a fair amount of extra reach for subjects that are more distant. With a full-frame camera, a 70 to 300mm lens would be the minimum requirement. Ideally, you’d want up to 400 or 500mm.
Otherwise, bring basic cleaning equipment, memory cards and spare batteries for everything that you plan to use, like your camera and flash.
If you’re photographing from a vehicle, Asilia offers bean bags in all of our vehicles, rest them on the window edge to stabilise your camera. Pack a tripod for situations in which you’ll be photographing on foot.
Handling Your Gear
Never take your lens off when it’s dusty or when the wind’s blowing, especially with mirrorless cameras. You want to avoid getting dust inside your camera body. At home, you can take it to the shop and get it cleaned without any problems. It’s a bad idea to try cleaning it yourself while on safari!
You should also try to keep your camera out of direct sunlight. The heat isn’t particularly good for your camera and can, in extreme cases, affect its working.
Technical Challenges
Getting focused can be challenging, particularly when you’re photographing animals that are in a thicket or between lots of trees. Your camera will want to focus on whatever’s closest and, if the thicket is in front of the animal, that’s what’s in focus. Single-point auto-focus modes on the camera usually allow you to be more specific with where you place the focus. Alternatively, manual focus is a viable solution for people with good eyesight.

Another potential issue is camera shake. The best times of day to photograph are normally early in the morning and later in the afternoon. The light is getting a little bit dimmer and you’ll probably be working with longer lenses. In these instances, anymovement of the camera becomes a concern and it could cause the images to be unsharp.
Again, a beanbag is very useful, though only if the car is switched off. If the engine’s running, the car will vibrate, with the vibration travelling through the beanbag into the camera and causing unsharpness in the images. You should also make sure that your shutter speeds stay above the focal-length number of your lens. This is a rule of thumb photographers use for avoiding camera shake.
Midday Sessions
There isn’t anything necessarily wrong with midday light. It just doesn’t look particularly nice. It’s quite dull.
Generally, wherever you’re photographing, you can find a direction of looking at the subject where the sun is more behind than in front of the subject. That slight backlight allows the light to separate the subject from the background a little bit better, and create some extra contrast. That can work quite well, especially if you convert your images to black and white.

Using Flash
In the context of wildlife photography, you’re usually dealing with animals that are surrounded by foliage. Ideally, you don’t want the flash to hit foliage that is in front of the animal, causing it to be far brighter than the animal. Again, that’s one of the reasons you should try lighting from the side.
With most cameras, if you use the automated flash systems in the dark, they tend to expose the subject too brightly, as the flash tries to light everything. You would need to use an exposure compensation function to mute the flash a little bit. Alternatively, you could set the flash up manually and do a test exposure.
Self-Drive or Guided Safaris?
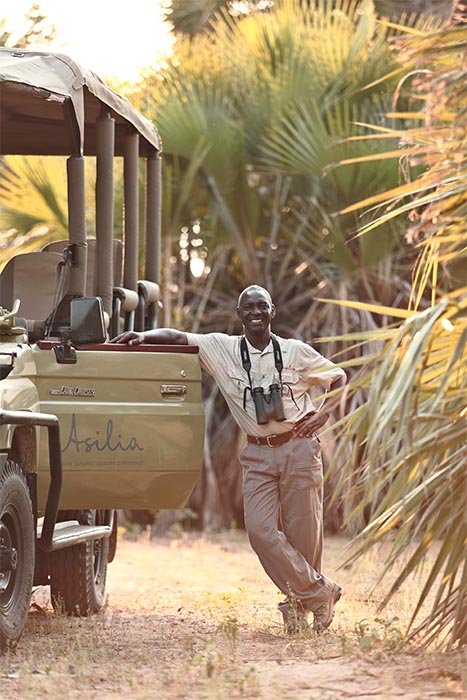
Self-drive safaris might give you more freedom in some respects. You’d certainly have more say in how long you stayed with a subject. That said, being able to rely on a guide’s knowledge is extremely advantageous. All Asilia guides are actually pretty skilled photogs themselves and will have plenty of tips to share with you!Safari guides are typically very knowledgeable about the animals and fairly knowledgeable about photography as well – given that they work with photographers all the time. They’re often good at helping you anticipate interactions by pointing you in the right direction and telling you what to look for.
For self-drive safaris, if you’re not familiar with an area or the animals in a particular area, it really becomes luck of the draw. You either get something or you don’t.
Anticipation
Anticipation is an essential aspect of the craft. Indeed, the best wildlife photographers spend days with groups of animals or individual animals, observing them and getting to know their habits. It’s important to understand things like when they visit waterholes during the day. Interactions between animals, and between animals and the environment are what make wildlife photographs interesting.
Patience
You need patience to find the animals you’re looking for. Also, good wildlife photographs capture interesting interactions or interesting behaviours. To see those interactions or behaviours, you have to wait. They don’t just happen all the time.

Composition
Once you’ve chosen the animal you want to photograph, scan the edges of your frame very carefully. Make sure nothing is intruding, like leaves or other animal’s backsides. Naturally, you won’t have this luxury if you’re photographing an action scene. You shoot what you can!
It’s also a good idea to avoid awkward cropping. Try not to chop off the animal in a way that makes it look lopsided. That is, if the crop is on the animal’s backside, or you’re trimming off an ear, it tends to look quite weird. Chop it off completely or show all of it.
Safety & Respect
While animals are beautiful and intriguing, they’re also wild and unpredictable. Respect them and enjoy your time in East Africa to the fullest, remembering to lower the camera lens every now and then and absorb the moment you are living. Your memories and stories of Africa will last longer than any photograph will.
Asilia’s First Photographic Safari Vehicle
Our very own, and first-ever, Asilia Photographic Safari Vehicle has arrived atNaboisho Campand is perfect for anyone who is passionate about photography. Now that you’re inspired and have the low-down on becoming a pro, why not have a go at spending a day in our Photographic Vehicle and putting your photography skills to the ultimate test…


The first guests to make use of it were rewarded with some seriously epic wildlife moments!George the Explorerwas lucky enough to spend time with some special characters whilst out on a game drive and the results were just phenomenal.[/vc_column_text][/vc_column][/vc_row]
The post First-Time Photographer? This Is For You appeared first on Asilia Africa.
More Experiences Articles

Experience A Slow Safari
26 July 2019By Anwynn Louw – Digital Marketing Assistant The Art of Slow Travel – “Slow T...

BBC One: Serengeti – The Elephant
25 July 2019By Britta Foulis – Content Marketing Manager BBC One’s latest mi...

Four Great Locations For A Family Reunion Safari In East Africa
19 July 2019By Anwynn Louw – Digital Marketing Assistant Planning a multigenerational saf...

BBC One: Serengeti – The Baboon
17 July 2019By Britta Foulis – Content Marketing Manager BBC One‘s latest mi...
